Beginners Guides
Need a refresher or are completely new to a game loop? Check these guides
Click a Guide - Read it below
Coming Soon
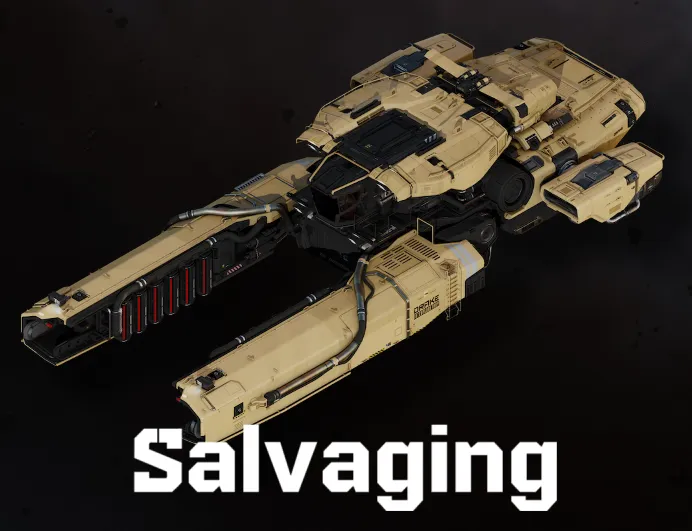
Star Citizen Salvaging: The Scrapper's Guide to Profit
Salvaging is the process of breaking down derelict ships and structural components into Recycled Material Composite (RMC) for sale. This guide details the two main salvaging methods: Hull Scraping and Component Salvage.
1. Preparation: Equipment and Location
Before you head out into the void, you need the right ship and location.
- The Ship: You need a vessel equipped with salvaging modules. The Drake Vulture (solo) and the Aegis Reclaimer (multi-crew) are the dedicated salvaging ships.
- Location (The Wreck): Look for derelict ships or debris fields. These can
be found via:
- Salvage Missions: Available on your mobiGlas (F1) in the Contracts Manager. These guide you to legal wrecks.
- Player-Created Wrecks: Look for markers in high-traffic or recent battle areas. Be cautious, as these are often unregulated and may attract pirates.
2. Hull Scraping (RMC Generation)
Hull Scraping is the most common method, used to harvest the hull plating into RMC.
- Activate Salvage Mode: Press the M key to activate Salvage Mode. Your HUD will switch to the salvaging interface.
- Toggle to Hull Scraping: Ensure your salvage tool is set to Scraping mode (typically via the G key).
- Position and Power: Fly close to the target hull and aim the twin laser beams at the plating.
- Monitor the Gauge: The central HUD displays a density/resource gauge.
- Optimal Zone (Green): Maintain the density meter in the green zone for efficient RMC collection.
- Adjust Power: Use the mouse wheel to adjust laser power and keep the density stable.
- Harvesting: As you scrape, plating converts into RMC and is stored in your ship's internal buffer. The hull section darkens when fully stripped.
- Transfer to Cargo: Once the buffer fills, transfer the RMC to cargo containers (SCUs). This is automated in the Vulture, and requires terminal interaction in the Reclaimer.
3. Component Salvage (High-Value Parts)
Component Salvage ("munching") retrieves high-value ship components such as quantum drives, coolers, and power plants. This is typically done using the Aegis Reclaimer's internal grinders.
- Preparation: Access to interior component racks may require cutting through wreck sections (using a multi-tool or the Reclaimer's cutting arm).
- Locate Components: Enter the wreck and find the component you want to salvage.
- Removal Tool: Use the appropriate tool (usually the Salvage Multi-Tool Attachment) to detach the component.
- Storage: The component becomes a physical object (small SCU box or item) and must be manually carried and loaded into your ship's cargo hold. These items sell for significantly more than RMC.
4. Selling the Loot
After collecting RMC or components, you must sell them for profit.
- Land: Touch down at a space station or city landing zone with a trade terminal.
- Access a Trade Terminal: Use the Commodity Kiosks.
- Selling RMC: RMC stored internally or in cargo boxes can be sold directly at most terminals.
- Selling Components: High-value components often fetch the best prices at Scrap or Commodity kiosks, depending on the station's economy.
Tip: Be cautious in high-traffic salvage zones - a full cargo hold can attract pirates or opportunistic players!
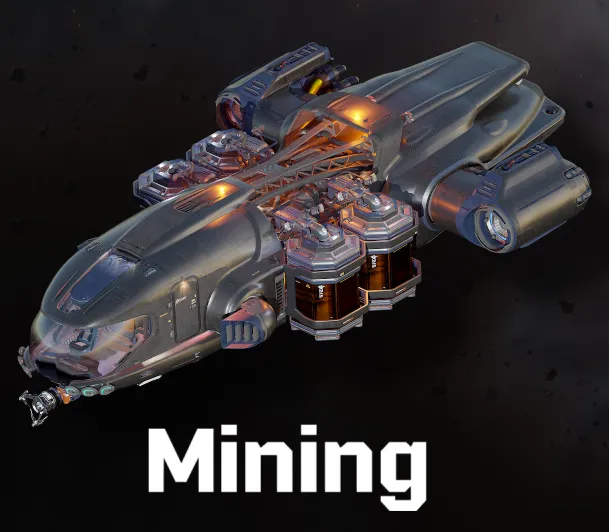
Star Citizen Mining: A Beginner's Guide to Profit
Mining is a highly profitable, skill-based profession in the 'Verse, blending technical precision with high-risk cargo runs. This guide breaks down the essential steps to get you from identifying a rock to selling refined materials.
1. Preparation: Getting Your Kit Ready
Before you launch, ensure you have the right equipment.
- The Ship: You need a dedicated mining vessel. The MISC Prospector (solo) and the Argo MOLE (multi-crew) are the primary ships. These come equipped with the specialized mining laser turret.
- Components (Optional, but Recommended): To tackle tougher, more valuable rocks, you'll need upgrades. Focus on Mining Heads (like the Helix for power or Brandt for stability) and Consumables (like Surge for instant energy bursts, or Stampede to lower resistance).
- Location: Decide where you want to mine. Asteroid belts (like the Yela Belt) offer floating rocks, while planets and moons (like Daymar or Aberdeen) offer large ground deposits.
2. Locating and Analyzing the Deposit
Finding the right rock is half the battle. You want high-value materials (like Quantanium or Bexalite) with low resistance and instability.
- Activate Mining Mode: Press the M key on your keyboard to switch your ship systems into Mining Mode. This replaces your standard weapons HUD with the mining interface.
- Scanning: While in Mining Mode, your Scanner is active. Point your ship's nose toward potential deposits (white diamonds on your HUD). The scanner will display the rock's Mass, Distance, and Material Composition.
-
Detailed Analysis: Once you've selected a rock, scan it to get its full
profile. Pay attention to:
- Optimal Charge Zone: The sweet spot where you must maintain energy.
- Instability: How violently the rock reacts to energy input (higher = harder to control).
- Resistance: How much power is needed to crack the rock (higher = longer/harder fracture time).
3. The Fracturing Process (Breaking the Rock)
This is the most challenging part of the loop, requiring precise control of your laser power.
- Target and Charge: Position your ship close to the rock and start channeling power by holding the Left Mouse Button (LMB).
-
Monitor the Gauge: Watch the Rock Energy Level gauge.
- Goal: Keep the indicator in the green Optimal Charging Zone.
- Too Low (White Zone): Nothing is happening - increase power.
- Optimal (Green Zone): Fracture meter increasing steadily - maintain!
- Too High (Red/Yellow Zone): Overheating! Staying in red too long causes a violent explosion, destroying the rock - and potentially you. Reduce power immediately.
- Adjust Power: Use the Mouse Wheel to fine-tune laser output and keep the indicator within the green zone. Instability and Resistance will influence how constantly you need to adjust.
- Fracture: When the Fracture Sensor reaches 100%, the rock will split into harvestable fragments.
4. Collection, Refining, and Profit
Once fractured, your work isn't done - you still need to convert raw material into sellable credits.
- Switch to Collection Mode: After fracturing, press M again to toggle your laser to Collection Mode.
- Siphon Fragments: Target the pieces and hold LMB to siphon raw ore into your ship's internal storage tanks.
- Refining: When full, fly to a station with a Refinery Deck (e.g. GrimHEX). Begin a Refining Order - raw ore cannot be sold directly. Refining takes real time but massively increases profit.
- Selling: Once refined, retrieve the finished cargo and sell it at any major trade station or landing zone for maximum returns.
Tip: If you strike Quantanium, be quick - it's extremely unstable and can explode if left in your ship for too long!
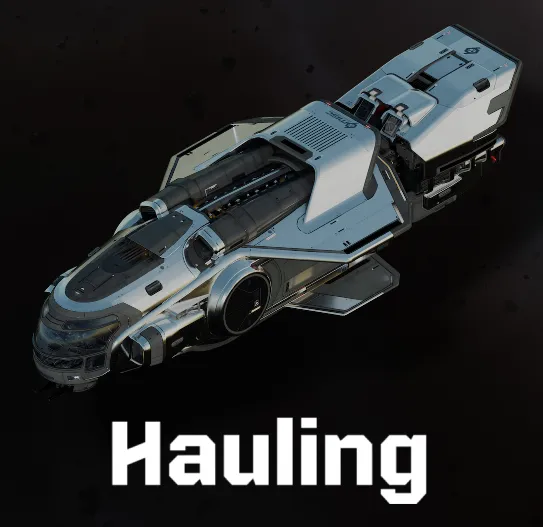
Star Citizen Hauling: The Complete Trading Guide
Hauling, or cargo trading, is the process of buying commodities low at one location and selling them high at another for profit. While this loop can be highly lucrative, it carries a high risk of loss due to piracy or technical issues.
1. Preparation: Ship, Funds, and Information
Success in hauling requires capital and careful planning before leaving the hangar.
- The Ship: You need a dedicated cargo vessel, typically measured by its SCU (Standard Cargo Unit) capacity. Popular haulers include the Freelancer MAX, Caterpillar, and Hercules C2 Starlifter. Ensure your ship has high shields and a fast Quantum Drive.
- Starting Capital: Trading requires significant upfront investment to buy the goods. Start with low-value commodities until you build enough capital for high-profit cargo.
-
Find Your Route: Determine where to buy low and sell high.
- External Tools: Many players use third-party tools to track real-time commodity prices because the in-game market is dynamic.
- In-Game Scouting: Fly between trade terminals (cities, rest stops, mining outposts) and manually check prices for high-demand goods.
2. Securing and Loading the Cargo
Once you have capital and a route, the actual trade transaction takes place at the terminal.
- Land and Access Terminal: Land at the appropriate trade location (such as a mining outpost or a city's Cargo Deck). Access a Commodity Kiosk (Trade Terminal).
- Verify Inventory: Select the location where your ship is stored (e.g., "Lorville - Teasa Spaceport").
-
The Purchase:
- Select the commodity you want to buy (e.g., Laranite, Agricultural Supplies).
- Choose how many SCUs of the commodity you want - the terminal shows cost and remaining ship capacity.
- Confirm the purchase. Cargo is automatically loaded into your ship's cargo grid.
Note on Bulk Hauling: Many profitable routes involve volatile goods (like Quantanium) or high-risk materials. Always consider the balance between risk and profit.
3. The Transport: Navigating and Risk Management
The longest and most dangerous part of the hauling loop is the transport phase.
- Plot the Route: Set your Quantum route via your HUD (B key) or the Starmap (F2).
- Quantum Travel: Engage Quantum Drive. Shorter routes are safer, but long-distance hauling often yields higher profits.
-
Piracy Risk: High-value cargo routes are common pirate hotspots.
- Mitigation: Use radar, fly with escorts or groups, run decoy shipments, or use faster ships if possible.
- Emergency Stops: If pirates interdict you or your ship malfunctions, remember that cargo is physicalized - losing the ship means losing everything aboard.
4. Selling the Commodity
Completing the sale is the final step to securing your profit.
- Arrive and Land: Fly to the destination station or city offering the highest sale price.
- Access Terminal: Use a Commodity Kiosk at the landing zone.
-
The Sale:
- Select your ship's storage location.
- Open the Sell tab - it displays your cargo grid contents.
- Review the current market prices and total profit margin.
- Confirm the sale - credits are instantly transferred to your wallet.
5. Profit Calculation
Your profit is simply the Sale Price minus the Purchase Price. Reinvest your profits into larger cargo runs to rapidly scale your hauling business.
Star Citizen Bounty Hunting: The Hunter's Guide
Bounty Hunting is a profitable combat profession involving tracking down and neutralizing targets - either NPC criminals or, in higher-tier missions, player criminals (PlaBeys).
1. Preparation: Loadout and Location
Success depends on speed, durability, and firepower.
- The Ship: A combat-optimized ship is essential. Fast, maneuverable fighters like the Arrow, Gladius, or the heavier Vanguard series excel. Ensure your weapons are correctly sized and your power components support sustained combat.
- The Gear (FPS Bounties): For ground-based bounties (bunkers or outposts), bring full FPS gear: heavy armor, a reliable rifle (P4-SC, AFS-MG), medpens, and a multi-tool.
- Reputation: High-paying bounty missions unlock as you gain Rep with the Bounty Hunter's Guild (BHG). Begin with lower-tier missions like MRT/LRT, then progress to VHRTs and ERTs.
2. Accepting the Contract
Bounty missions are tracked and managed through your mobiGlas.
- Access Contracts: Open your mobiGlas (F1) and navigate to the Contracts Manager.
- Select Bounty Hunting: Choose the Bounty Hunter Guild missions under the legal contracts section.
-
Choose Tier: Select a mission based on your Rep. Common tiers include:
- ERT (Extreme Risk Target): Highest difficulty - often capital ships or elite players.
- VHRT (Very High Risk Target): Advanced ship combat requiring skill and strong loadout.
- HRT, MRT, LRT: Lower tiers ideal for learning and early progression.
- Accept Mission: After accepting, the target's location will appear on your HUD and Starmap.
3. Tracking and Engagement (Space Bounties)
Space bounties require you to travel to and eliminate targets in ship-to-ship combat.
- Quantum Travel: Set your Quantum Drive destination to the bounty marker and jump. Targets often appear near moons, planets, or nav points.
- Initial Scan: On arrival, use your ship's scanner (Tab key) to confirm the target's identity and determine if they have escort ships.
-
The Fight:
- Positioning: Use strafing, speed, and afterburners to flank enemies and stay in their blind spots.
- Power Management: Adjust your power triangle (F5/F6/F7) to prioritize shields or weapons depending on the situation.
- Elimination: Destroy the target's ship. A confirmation notification and reward appear immediately once the bounty is neutralized.
4. Ground Bounties (Bunker/Outpost Clearances)
Ground bounties require landing, breaching a bunker or outpost, and clearing hostile NPCs in an FPS combat environment.
- Insertion: Quantum to the mission marker and land a safe distance away to avoid turret fire.
-
Ground Assault:
- Clear External Threats: You may need to disable comm arrays or avoid turrets before approaching.
- Entry: Proceed inside carefully - bunkers have narrow corridors and hostile NPCs with unpredictable behavior.
- Objective: Eliminate all hostiles or the specific named target indicated by your HUD.
- Exfiltration: Once the mission is complete, return to your ship to receive your reward.
5. Collecting the Reward
Rewards are automatically deposited into your mobiGlas wallet upon mission completion. High-tier missions may include cool-downs or confirmation steps but offer significantly higher payouts.
Bounty hunting is one of the fastest ways to earn UEC - but also one of the riskiest. The toughest missions often require engaging skilled player pirates or heavily armed NPC escorts.
Contested Zones: A Guide to High-Risk, High-Reward Operations
Contested Zones (such as Jumptown, drug labs, or high-tier illegal bunkers) are hotspots that offer massive profit but guarantee Player-vs-Player (PvP) engagement. These areas present the highest risk in Star Citizen - but also the greatest potential rewards.
1. Preparation: Loadout and Strategy
Contested Zones demand readiness for both air and ground combat.
Ship Loadout (Air Superiority)
- Small, Fast Fighters: Do not bring haulers or industrial ships unless escorted. Use fast, high-DPS fighters like the Arrow, Gladius, or P-52 Merlin to secure airspace.
- Stealth Components: Equip low-signature coolers and stealth components. Remaining undetected is your greatest defense.
- Fuel & Repair: Ensure full repairs and Quantum fuel - rapid extraction may be required.
Personnel Loadout (Ground)
- Armor: Use heavy armor (e.g., Novikov or Orcus) for maximum durability.
- Weapons: Bring a reliable rifle (P4-SC, LMG for suppression) and ample magazines.
- Medical Gear: Carry MedPens, a MedGun, and consider having a medical ship (Cutter Red / Apollo) nearby for respawns and triage.
Strategic Planning (Obsidian Squad Focus)
- Roles: Assign defined roles:
- Air Cover (dogfighters like Dreid / Marcsand2)
- Ground Team (FPS engagement)
- Logistics (hauler/salvager staying hidden or distant) - Time of Day: Lower-pop hours may reduce competition - but never guarantee safety.
2. Approach and Air Control
The enemy's greatest advantage is usually air superiority - take it from them.
- Staging Area: Quantum to a nearby moon or asteroid (50-100 km away) and power down.
- Scout: Send a fast fighter ahead to check for active ships, turrets, or hostile players chatting in Global.
- Secure Airspace: Air superiority is mandatory. Eliminate threats and maintain a perimeter before anyone lands.
- Insertion: Land only when clear - ideally out of sight or directly next to the objective for rapid offload/extraction.
3. Ground Operation and Data Management
Ground combat in Contested Zones is chaotic and unforgiving.
- Entry and Sweep: Ground Team secures entrances, corridors, and defensive chokepoints.
- Illicit Goods: Access the terminal, drug lab, or inventory console and quickly load the highest-value items (Quantanium, narcotics, etc.). Speed is crucial - every second increases risk of a counter-attack.
- Communication: Maintain constant voice comms with Air Cover. If new ships appear on radar, Ground Team may need to abort instantly.
- Death: If a teammate goes down, revive immediately using the MedGun to avoid full respawn and gear loss.
4. Exfiltration and Selling
The extraction phase is almost as dangerous as the assault.
- Logistics Retrieval: Once cargo is loaded onto the hauler (e.g., MrMatt's ship), it must leave immediately via Quantum.
- Air Cover Retreat: Dogfighters hold the area until the hauler is safely in QT, preventing pursuit.
- Avoid High-Traffic Areas: Avoid major landing zones like Area18 - pirates often camp there. Jump to remote rest stops for safety.
- Selling: Illegal cargo must be sold at black-market kiosks (GrimHEX, select rest stops). Legal goods can be sold anywhere.
The key to surviving Contested Zones is coordination, speed, and knowing when to retreat. A bad fight can wipe ships, gear, and profit in seconds - discipline wins these zones.
Star Citizen ASD Facilities: Advanced FPS Operation Guide
ASD Facilities and other high-threat bunkers are critical FPS combat zones. Unlike standard bounty missions, these require deeper penetration, stronger enemies, and tactical looting - making them a core component of Obsidian Squad's advanced ground operations.
1. Preparation: Loadout and Ship Choice
Success in an ASD mission depends on what you bring - both in the air and on the ground.
- FPS Gear: Go heavy. Wear heavy armor and a helmet - enemy NPC fire is deadly. Bring a reliable medium or heavy rifle (P4-SC, A03 Sniper) and multiple spare magazines.
- Medical Readiness: Carry several MedPens (healing) and LumiPens (reviving). As Ekuls teaches: everyone is a support unit. Retreat, heal, and re-engage as needed.
- The Ship: Use a ship suited for quick insertion/extraction and resistant to light turret fire. Smaller-profile ships or ground vehicles work well. Keep main combat ships (like Dreid's) powered down nearby for Air Cover.
- The Mission: Look for high-payout Mercenary contracts in your mobiGlas involving clearing hostile bunkers or neutralizing security personnel.
2. Tactical Insertion and Clearing the Perimeter
Rushing the facility is the fastest way to die. Approach with caution and coordination.
- Approach and Turrets: Quantum to a safe distance (15km+), then fly low to avoid detection. If the facility has external turrets, Air Cover must remove them - or the team must land outside turret range and proceed via ground vehicle or on foot.
- The Breach: If there's an airlock, expect immediate resistance. Use a Multi-Tool with a cutting attachment to slice the door slowly. Peek inside and assess enemy positions before committing.
- Room Clearing: Move methodically. Pie corners, check hallways, maintain rear security. Enemies travel in pairs and can quickly flank you in tight corridors. Use cover and aim for headshots to conserve ammo.
- Target Priority: Eliminate HUD-marked priority targets first. Mission completion credit is awarded once all designated hostiles are neutralized.
3. Looting and Extracting Illicit Cargo
The real profit often comes after the shooting stops.
- Looting: Once the area is secure, loot enemy bodies for valuable armor, weapons, Multi-Tools, and other utility items.
- Illicit Goods: ASD sites frequently have back rooms, labs, or storage areas containing illegal narcotics (WiDow, Neon) or high-demand legal components. These can dramatically increase mission profitability.
- Cargo Management: Gather high-value items and organize them in your ship's storage. As MrMatt says: "Loot is only profit once it's sold."
- Fast Exfiltration: After looting, leave immediately. Launch, spool Quantum, and jump the moment you're clear. ASD Facilities are hostile zones - lingering invites a counterattack or pirate ambush.
4. Selling the Spoils
For maximum profit, sell illegal items at black-market kiosks (GrimHEX or select Rest Stops). Legal components can be sold safely at major trade kiosks in city stations.
Clear communication, discipline, and sticking to your assigned roles are essential for a successful ASD raid - and for making it home with both your gear and your profit.